Newcastle Cardigan for my Brother In Law

My brother in law is very hard to shop for. He loves coffee, but we've gotten him too many coffee themed gifts in the past (it honestly also feels like a cop-out at this point). He loves being outdoors, kayaking, camping, and birdwatching, but there's not much I can get him that he and my sister don't already have - or might not want anyway. He's not really a things person - functional things yes, knicknacks no. He reads a lot, but with my luck I'd buy a book he already has.
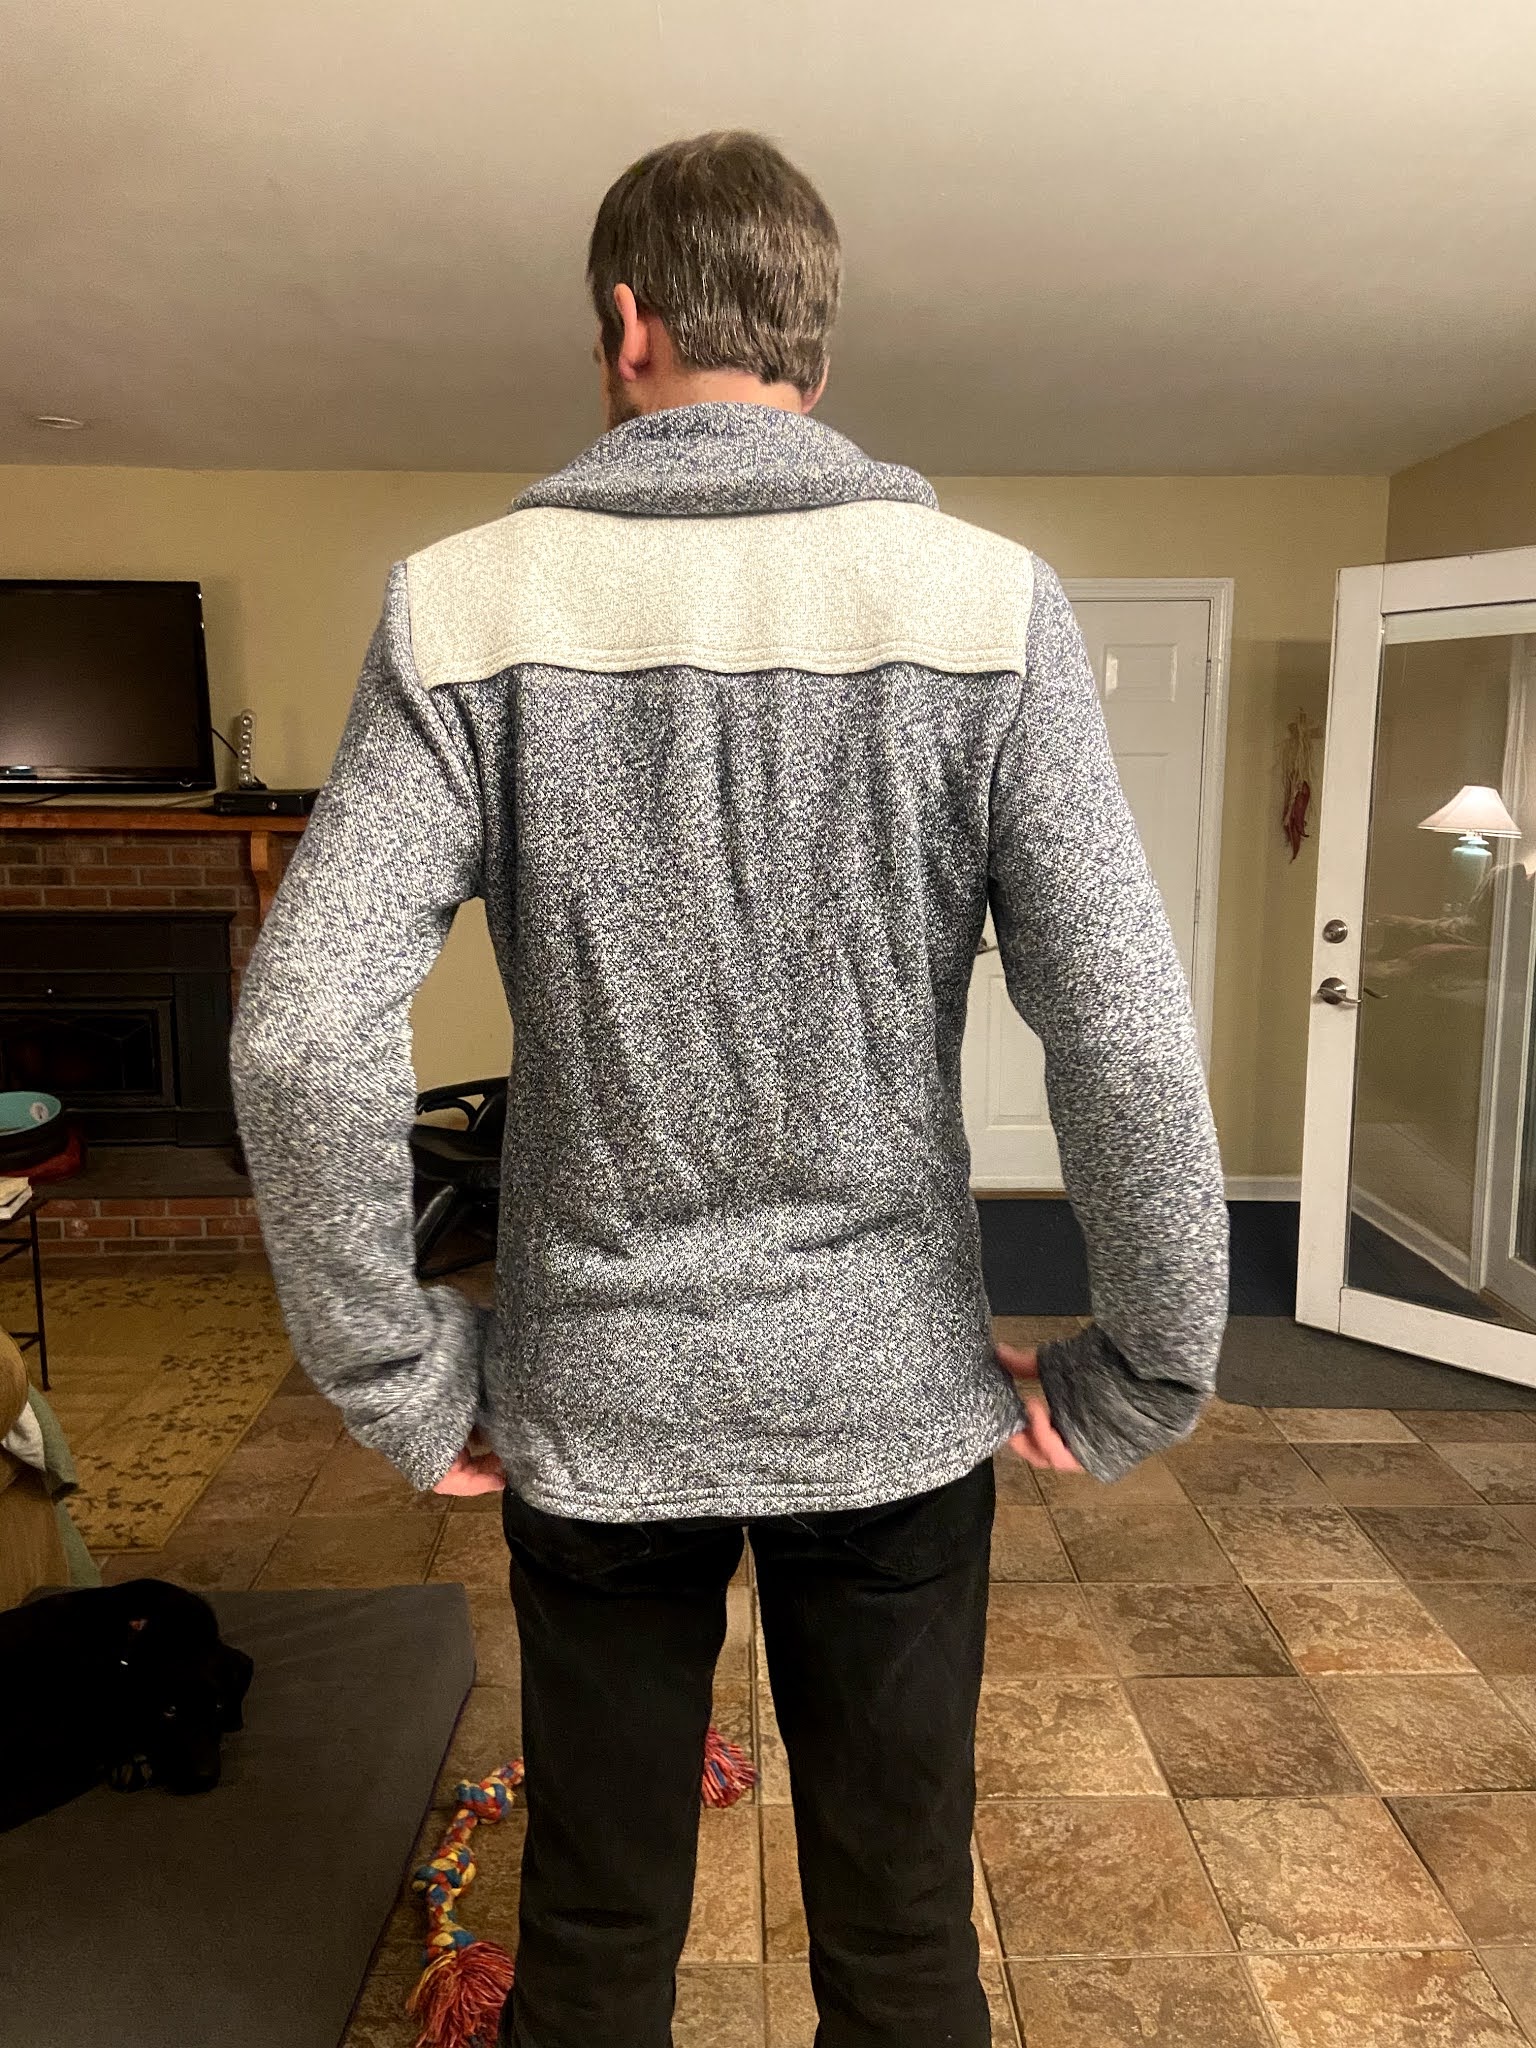
While at Stitch Sew Shop in Alexandria, I happened upon the Newcastle Cardigan pattern by Thread Theory. It's a lovely men's sweater and feels very sophisticated and professorial - and seemed very much like my brother in law. I decided to make him a sweater.
The newcastle has many options for construction - I decided to go with a contrasting yoke and back piece with the shawl collar.

I happened to be buying fabric to make the Toaster Sweater for my mother and sister (more on that in a future post), and decided to get the same navy heather french terry fabric as my sister's Toaster Sweater to make the field for the Newcastle. I chose a salt and pepper grey in the same color for the contrast.

I had read reviews of the Newcastle, and knew it was drafted with long sleeves and for tall men, which is perfect as my Brother in Law is quite tall - he's about 6'4, with a wide wingspan, and lanky. I took the initial measurements my sister sent me and copied the medium pattern onto Swedish pattern paper - adding 2 inches in length to both the sleeves and the torso. Due to the new length, I also added one more button.
I bought a thin, less expensive slub knit fabric at Finch, having discussed with the Finchettes there my hesitation in cutting fabric when I had absolutely no idea if the modifications would fit my Brother In Law. I have no idea why I'd never thought to do a mockup in knit before. If the mockup did fit, it would confirm measurements. If it did not, I could see where adjustments needed to be made. The mockup would definitely fit my sister, so she'd have an oversized cardigan to steal at the very least.

It was a good thing I did. I took the mockup when I visited my Sister at Christmas, and had my BIL try it on - it was tight in the shoulders, a little short in the sleeves, and the torso was not quite long enough.
When I got home, I re-drafted the pattern in Large, with an additional 1.5 inches on the sleeves (3.5 inches total) and 4 inches total in the torso.
Having made the mockup, I understood the construction of the sweater quite well. The downside? The french terry is a very thick fabric. It sewed up fairly well until I needed to stitch the seam around the button placket and up the shawl collar. The pattern has you do it in halves - and one half sewed up just fine, even over five layers of french terry in some places.
The second half did not. It is a mirror of the other side. I have no idea why my machine decided it hated the left side, but it broke about 6 needles. The only that didn't snap in the bulk was the 100/16. I slowly went up in sizes, until it finally sewed.
And then it was time for buttonholes. I'm going to be honest, I hate buttonholes. I somehow always have issues with them. This sweater was no exception. I put plenty of stabilizer for the bottom buttons - but the top one, with the bulk of the join at the shawl collar immediately above, was particularly difficult. I legitimately couldn't get it to work.
I went into Finch with my issues, and Sam and I tried to figure out how to get the fabric to move through my machine. We failed, and then decided - why not do bound buttonholes? I bought some dark navy fabric to use, and being able to just straight stitch made swing the buttonholes much, much easier. Because it has a button placket on the reverse, I had to make bound buttonholes on both sides of the fabric, and then hand stitched the openings together. Unfortunately, I also forgot to take photos of the finished product - but you can see the test buttonhole below.


I recommend not using such a thick fabric for the yoked version - the sheer mass of fabric makes it slightly difficult in places.


Comments
Post a Comment